
How to Make a Print-Ready Photo Collage
A collage that looks good on screen can still disappoint on paper: faces cut off at the edge, a soft photo stretched across half the page, or a print that comes back smaller than the frame. This guide walks through making a collage in Pixemon that prints the way you expect, from choosing the layout to checking a proof.

1. Decide where the collage will end up
Before choosing photos, decide the finished size: a 4 × 6 print for a card, an 8 × 10 for a frame, or a tall image for a phone. The size decides the shape of the layout and how many photos can fit while staying recognisable. As a rough guide, four to six photos suit an 8 × 10; more than that and each picture becomes small.
2. Choose a template or build your own
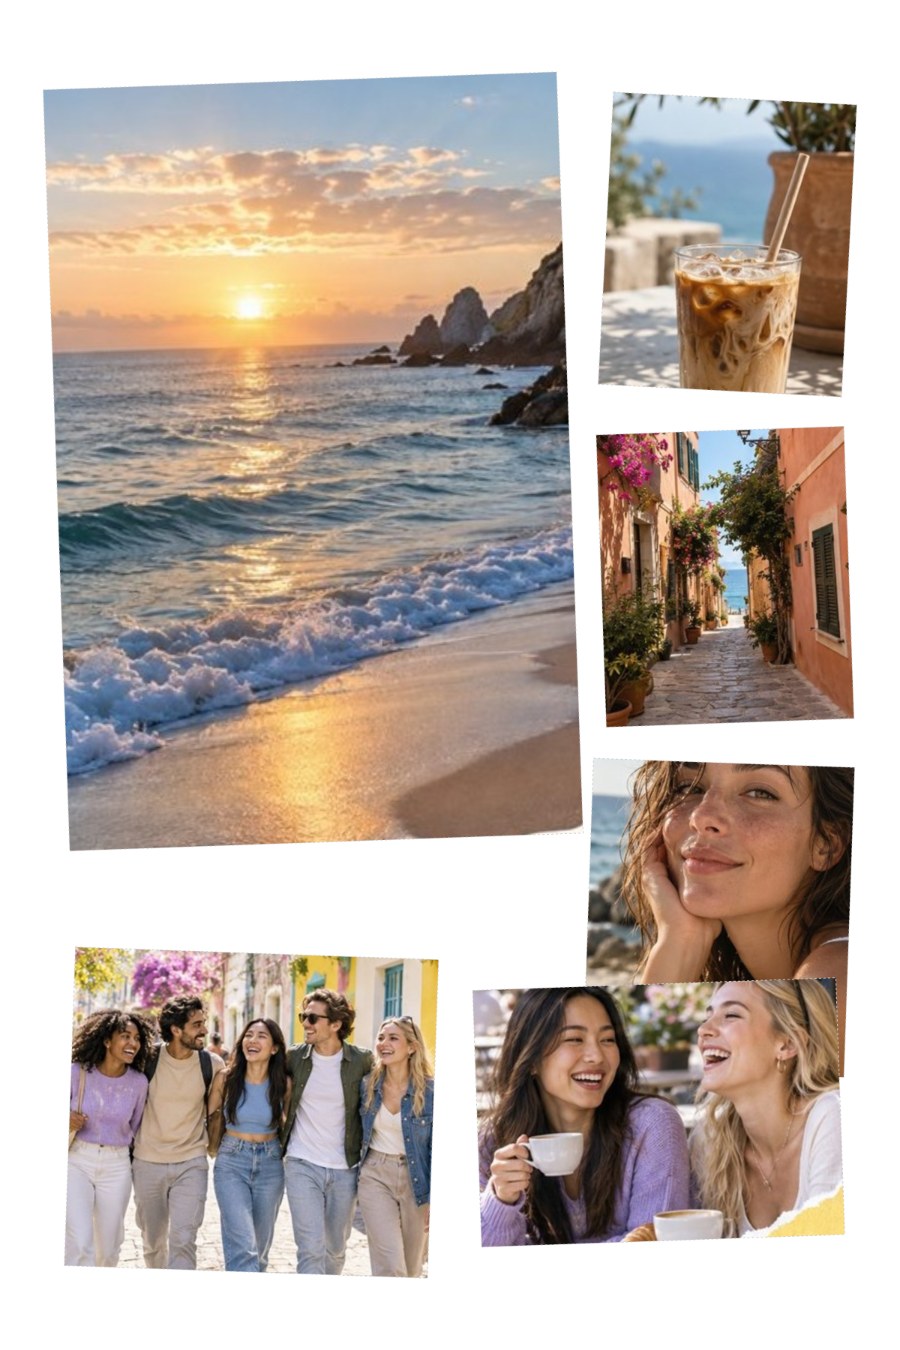
Pixemon includes ready-made collage templates sized for photo paper, such as 8x10 Social Story (five photos), 8x10 Magazine Mix (six), 8x12 Poster Mood (six), and 8x12 Creator Grid (seven). Open the layout panel and pick one to see its slots.
For a custom arrangement, open the layout panel, choose Add Package, then Collage. Give the layout a name and add one row for every photo. Each row sets the box's position (Origin X and Origin Y), its Width and Height in millimetres, and an optional Rotation.
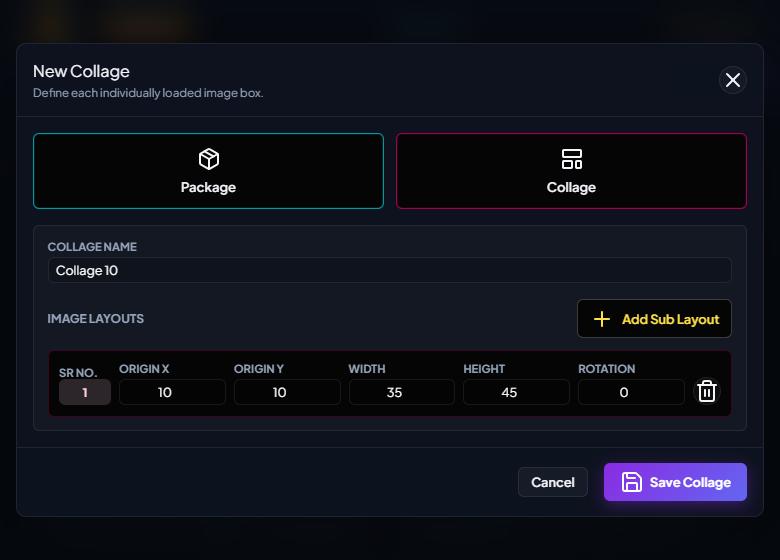
Pixemon adds a white border of up to 10 mm around the boxes and sizes the sheet to fit them. A collage made for a particular photo paper is never larger than that paper: if the border would push it past the paper's edges, Pixemon uses the exact paper size and narrows the border instead.
3. Give one photo the lead
Collages read best when one image is clearly the most important. Put your strongest photo in the largest box and use the smaller boxes for supporting moments. In the Social Story template above, the lead photo is 116 × 152 mm; the others are roughly half that size or less.
Keep related photos near each other, and use consistent gaps so the collage reads as one design rather than a pile of pictures.
4. Load and crop every photo
Load a photo into each numbered slot. Pixemon fills each box with the photo, cropping whatever does not fit the box's shape. Check every slot carefully: tall and wide boxes crop a lot, and it is easy to lose the top of a head or someone at the edge of a group shot. If a crop is wrong, choose a photo whose shape is closer to the box.
5. Match the paper's shape
A 4 × 6 print has a 2:3 shape, an 8 × 10 is 4:5, and an 8 × 12 is 2:3 again. The same collage cannot fill all of them without cropping or leaving borders. Pixemon's templates are made for a specific paper; for a custom layout, compare its width and height with the paper you plan to use.
When ordering from a lab, read the preview carefully. A fill option usually crops the edges of your collage to fill the paper, while fit keeps the whole collage and adds a border. Never stretch a collage to remove white space: it changes the shape of every face.
6. Check resolution where each photo appears
At 300 pixels per inch, an 8 × 10 collage is 2400 × 3000 pixels. That is a useful target for the finished file, but it does not guarantee detail. A small source photo placed in a large box is enlarged, and it will look soft even though the whole file has enough pixels.
A quick check: work out how wide the box is in inches and how many pixels the photo has across. The lead box in the Social Story template is 116 mm, about 4.6 inches, wide; a photo at least 1400 pixels across gives it about 300 pixels per inch. Put weaker photos in smaller boxes, and use original camera files rather than social media downloads. Our print resolution guide explains the calculation in detail.
7. Save, then make one proof print
Save the finished collage when every slot is filled. Before ordering several copies or buying a frame, print one copy and look at it in ordinary light:
- Is any face or important detail too close to the edge? Frames hide a few millimetres on each side, and borderless printing trims the edges.
- Are dark areas muddy? Screens are brighter than paper, so shadows often print darker than they look.
- Is small text, such as a date or caption, still readable?
- Is the print the size you expected? For a gift collage, slight scaling to fit the paper is fine. For anything measured, check with a ruler.
Before you send the file to a printer
- Every slot is filled, and no photo appears twice by accident.
- Names, dates, and captions are spelled correctly.
- The collage's shape matches the paper, or I have chosen fit or fill deliberately.
- I am sending the saved file itself, not a screenshot or a copy that went through a chat app.
- I have noted the paper size and whether a border is intended, so the printer does not have to guess.
Keep your original photos as well as the finished collage. A saved collage is a single flattened image; if you want to make another version later, save the layout itself with a clear name such as "Family 8x10".
Start a collage
Choose a template or build your own layout in Pixemon. Everything runs in your browser and your photos stay on your device.
Open the collage makerRelated guides: collage layout ideas and how many pixels a print needs.