
Photo Print Resolution: How Many Pixels You Need for a Sharp Print
A print looks sharp when the photo has enough pixels for every inch of paper. The "DPI" number in a file's properties does not decide that. What decides it is how many pixels the photo has and how large you print it. This guide shows how to work that out for your own photos, how large common phone pictures can be printed, and how to get the exact size on paper.
The short answer
- Pixels needed = print size in inches × 300 for prints you hold in your hand.
- In millimetres: pixels = mm ÷ 25.4 × 300, which is about 11.8 pixels for every millimetre.
- 4 × 6 in needs 1200 × 1800 pixels, 5 × 7 in needs 1500 × 2100, and A4 needs 2480 × 3508.
- Below about 200 pixels per inch, small prints start to look soft when you look closely. Wall prints seen from a distance need far fewer.
Pixels, PPI and DPI are three different things
- Pixels are the points of colour your camera recorded, for example 4032 × 3024. That count is fixed when the photo is taken. Software can add more pixels later, but it cannot add detail the camera never captured.
- PPI (pixels per inch) is how many of those pixels land on each inch of paper. It depends on how large you print. The same 4032-pixel-wide photo gives 672 PPI when printed 6 inches wide and about 200 PPI when printed 20 inches wide.
- DPI (dots per inch) describes the printer. An inkjet rated at 4800 × 1200 DPI uses many tiny ink dots to reproduce each pixel. That number is about the printer's mechanism, not your photo, so there is no need to prepare a photo at 4800 pixels per inch.
Photo labs and editing programs often say "300 DPI" when they mean 300 pixels per inch on the paper. Both phrases usually refer to the same target. In this guide, PPI always means pixels on the paper.

The formula, with worked examples
Pixels needed = millimetres ÷ 25.4 × PPI
Your photo's PPI = its pixels ÷ inches printed
- A 5 × 7 in print at 300 PPI: 5 × 300 = 1500 and 7 × 300 = 2100, so the photo needs 1500 × 2100 pixels.
- A 35 × 45 mm photo at 300 PPI: 35 ÷ 25.4 × 300 ≈ 413 and 45 ÷ 25.4 × 300 ≈ 531, so about 413 × 531 pixels.
- Checking a photo you already have: a 1080 × 1350 image saved from social media and printed at 8 × 10 in gives 1080 ÷ 8 = 135 PPI, which looks soft up close. The same file printed at 4 × 5 in gives 270 PPI and looks sharp.
To find your photo's pixel size, open its details: on Windows, right-click the file and choose Properties, then Details. On an iPhone, open the photo and swipe up. On Android, open the photo in Gallery or Google Photos and tap the Info or Details option.
Pixels needed for common print sizes
| Print size | In millimetres | Pixels at 300 PPI | Pixels at 200 PPI |
|---|---|---|---|
| Wallet, 2.5 × 3.5 in | 63.5 × 88.9 mm | 750 × 1050 | 500 × 700 |
| 4 × 6 in | 101.6 × 152.4 mm | 1200 × 1800 | 800 × 1200 |
| 5 × 7 in | 127.0 × 177.8 mm | 1500 × 2100 | 1000 × 1400 |
| 8 × 10 in | 203.2 × 254.0 mm | 2400 × 3000 | 1600 × 2000 |
| A4 | 210 × 297 mm | 2480 × 3508 | 1654 × 2339 |
| 11 × 14 in | 279.4 × 355.6 mm | 3300 × 4200 | 2200 × 2800 |
| A3 | 297 × 420 mm | 3508 × 4961 | 2339 × 3307 |
| 12 × 18 in | 304.8 × 457.2 mm | 3600 × 5400 | 2400 × 3600 |
300 PPI is the safe target for prints you hold. 200 PPI is a practical lower limit for the same prints, and many photos look fine anywhere between the two. Prints that hang on a wall can use less, as the next section explains.
How sharp is sharp enough depends on viewing distance
300 PPI is a sensible target for photos you hold, but it is not a law. The further away you stand, the less detail your eyes can pick out. A common rule of thumb, based on normal eyesight resolving about one minute of arc, is:
| How the print is seen | Typical distance | PPI that looks sharp |
|---|---|---|
| Photo held in the hand | 30 cm (12 in) | about 290 |
| Frame on a desk | 60 cm (24 in) | about 145 |
| Wall print seen across a table | 90 cm (3 ft) | about 95 |
| Poster seen across a room | 1.5 m (5 ft) | about 60 |
So a 12-megapixel photo that gives only 150 PPI as a 20 × 27 in poster can still look good on a wall, while the same pixel count would look soft as a close-up print of that size. Treat these numbers as a guide: text, fine patterns, and people who inspect prints closely all need more.
How large can you print a phone photo?
| Photo source | Pixels | Largest print at 300 PPI | Largest print at 200 PPI |
|---|---|---|---|
| 8 MP camera (older phones) | 3264 × 2448 | 10.9 × 8.2 in (27.6 × 20.7 cm) | 16.3 × 12.2 in |
| 12 MP camera (the default on most phones) | 4032 × 3024 | 13.4 × 10.1 in (34.1 × 25.6 cm) | 20.2 × 15.1 in |
| 48 MP photo saved at full resolution | 8064 × 6048 | 26.9 × 20.2 in (68.3 × 51.2 cm) | 40.3 × 30.2 in |
| Photo received in a chat app | often about 1600 × 1200 | 5.3 × 4.0 in (13.5 × 10.2 cm) | 8.0 × 6.0 in |
| Image saved from social media | 1080 × 1350 | 3.6 × 4.5 in (9.1 × 11.4 cm) | 5.4 × 6.8 in |
Two things catch people out here:
- Advertised megapixels are not always what is saved. Many 48 and 50 MP phones save 12 MP pictures by default and use full resolution only in a special mode. Check the pixel size in the photo's details rather than trusting the camera's specification.
- Messaging and social apps shrink photos. A picture that arrived in a chat or was saved from a social feed usually has far fewer pixels than the original. When you want to print it, ask for the original file, or ask the sender to share it as a document so it is not compressed.
Cropping uses up pixels
Every crop throws pixels away. If you crop a 4032 × 3024 photo down to one face that is 1000 pixels wide, you now have a 1000-pixel photo: enough for a print about 3.3 inches wide at 300 PPI, or 5 inches wide at 200 PPI. Before cropping tightly, decide how large you want to print, then check that the cropped area still has enough pixels.
Enlarging a photo in software (upscaling) can smooth out blocky edges, but it cannot recover detail the camera never recorded. Pixemon's Upscale option is useful for avoiding jagged edges. It will not turn a 100 PPI photo into a true 300 PPI one.
Why the edges of your photo get cut off
Most phone cameras take photos in a 4:3 shape. A 4 × 6 print is 3:2, which is longer and narrower. To fill the paper, part of the photo has to be trimmed. For a 4032 × 3024 photo that is 336 pixels, about 11% of the height. You can crop the photo to 3:2 yourself, so you choose what is lost, or print it with white bars (often called fit instead of fill). 5 × 7 and 8 × 10 are different shapes again (5:7 and 4:5), so check each size you order.
The "DPI" in a file's properties does not change sharpness
JPEG and PNG files can store a DPI value, such as 72 or 300. It is only a note about the intended print size. Changing it from 72 to 300 does not add a single pixel, so the photo is exactly as sharp as before. What matters is the pixel count compared with the print size.
Pixemon saves images as JPG or PNG files without this value, so some programs report them as 72 or 96 DPI. That is expected. Pixemon draws its print sheets and collages at 300 pixels per inch: a 35 × 45 mm photo on a sheet is about 413 × 531 pixels. When you order from a print lab, choose the print size in the lab's order form rather than relying on the file's DPI value.
Getting the exact size on paper
Sharpness is only half the job. Prints that must be an exact size, such as ID photos, also have to come out of the printer at 100%. These steps prevent most problems.
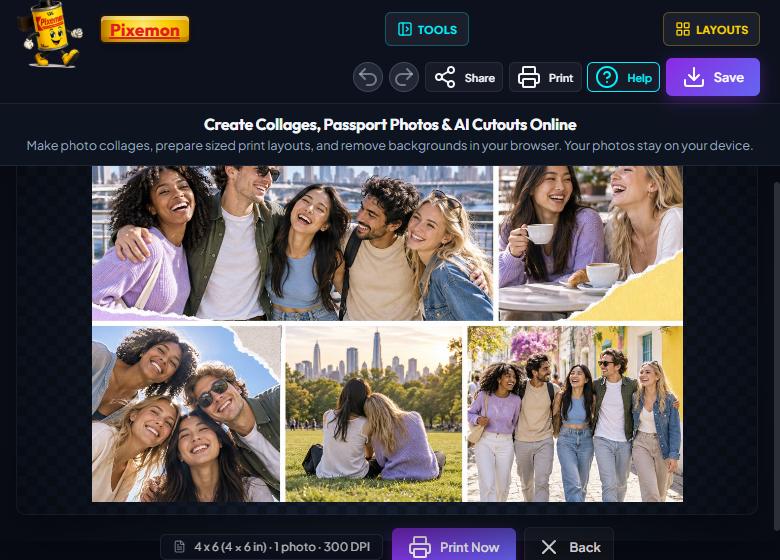
- Check the sheet size before printing. For print sheets and collages, Pixemon leaves 2 mm gaps between photos and a white border of up to 10 mm around them. A sheet made for photo paper is never larger than that paper: eight 35 × 45 mm photos are laid out on an exact 4 × 6 in sheet (152 × 102 mm), with a narrower border. Other sheets are sized to fit their photos, for example Auto-sized Sheet (55 × 65 mm) for a single 35 × 45 mm photo. The preview shows the size; make sure your paper is at least that large.
- Set the scale to 100% or "Actual size". "Fit to page" and "Shrink to fit" scale everything down, so a 35 × 45 mm photo can come out a few millimetres too small.
- Choose the paper size that is in the tray. Pixemon tells the browser the page size, but some printer drivers replace it with their own default, such as A4 or Letter.
- Turn off borderless printing for anything that must be an exact size. Borderless mode enlarges the image slightly so the ink runs off the edges, which changes the size and trims the outside. The white border Pixemon adds is there so you do not need borderless mode.
- Measure one test print with a ruler. If 35 mm comes out as 33 mm, something is scaling the page. Fix that before printing a batch.
No printer at home? Choose Save as PDF in the print dialog and take the PDF to a print shop. Ask them to print it at 100% with no scaling.
Checklist before you print
- I know the print size, and my photo has at least 200 (ideally 300) pixels per inch at that size.
- I am printing the original photo, not a copy from a chat app or social media.
- I have cropped to the paper's shape, or chosen to print with white bars.
- The print dialog is set to 100% or Actual size, with the right paper size and borderless printing off.
- I have measured one test print.
Common questions
Is 300 DPI required for a good print?
No. 300 pixels per inch is a reliable target for prints viewed up close, and most photos still look good at 200 to 250. Large prints viewed from a distance need much less.
Will 600 PPI look sharper than 300?
For ordinary photo prints viewed at a normal distance, most people see little or no difference above about 300 PPI. The file just gets larger.
Can I print a low-resolution photo sharply?
Print it smaller. Halving the print width doubles the pixels per inch. Upscaling can make edges look smoother, but it cannot add real detail.
Try it with your own photo
Open a photo in Pixemon, choose a paper size or a print layout, and open the print preview to see the size and resolution before you print. Everything runs in your browser, and your photos stay on your device.
Open the Pixemon editorRelated guides: passport photo sizes and official sources and how to make a print-ready photo collage.