
How to Fix Photo Colour and Brightness, Step by Step
Most photos that look wrong have one of three problems: they are too dark or too bright, they have a colour cast from the light they were taken in, or they look flat. Each problem has a specific fix, and doing them in the right order saves a lot of back-and-forth. This guide explains what each control in Pixemon actually does to your photo, so you can choose the right one.
Start with the right order
- Brightness first. It is hard to judge colour in a photo that is too dark.
- Then the colour cast. Neutral greys and skin tones are the easiest places to see it.
- Then contrast. Contrast exaggerates whatever colour is already there, so fix the colour before adding it.
- Finally, filters or fine adjustments such as Levels, Hue and Saturation, black and white, or sepia.
Pixemon keeps your original photo and recalculates the result from it each time, so you can undo steps or try a different order without the image getting worse.
Brightness
Each tap of Bright + or Bright − adds or subtracts 10 levels from every pixel, on the usual scale of 0 (black) to 255 (white). That makes the whole photo lighter or darker by the same amount.
Watch the brightest areas while you lift a dark photo. Once a sky, a white shirt, or a bright face reaches 255, its detail is gone and cannot be brought back by darkening again. If the highlights are already close to white, raise the brightness only a little and use Levels (below) to lift the darker tones instead.
Colour casts: the Yellow, Magenta and Cyan controls
The colour of the light changes the colour of the photo. Indoor bulbs often make photos orange; shade and overcast days make them blue; some fluorescent and LED lights add green. Pixemon corrects this with three pairs of buttons, each working against one of the three primary colours of light:
| Your photo looks too… | Tap | What it does |
|---|---|---|
| Blue or cold | Y + | Removes blue, so the photo warms up |
| Orange or yellow | Y − | Adds blue back |
| Green | M + | Removes green |
| Pink or magenta | M − | Adds green back |
| Red, such as flushed skin | C + | Removes red |
| Cyan or lacking warmth in skin | C − | Adds red back |
Each tap changes the colour by 8 levels, so you can make small, repeatable corrections. Judge the result on something that should be neutral, such as a white wall, grey pavement, or the white of an eye, and on skin.
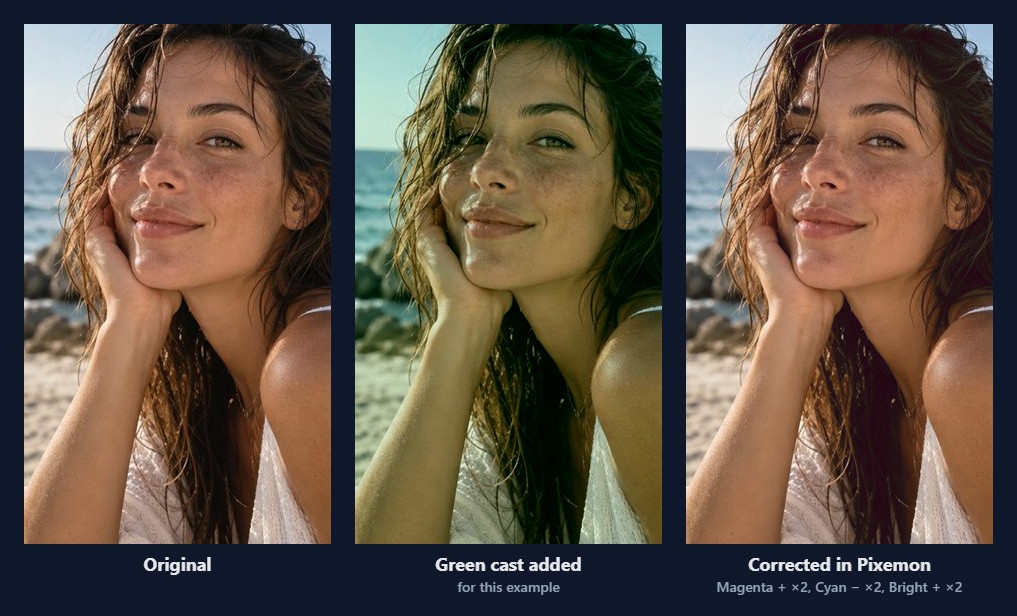
Real casts are rarely just one colour. In the example, the cast had taken away red and blue as well as adding green, so it needed three different corrections. Fix the strongest colour first, look again, and stop as soon as neutral things look neutral.
Contrast
Each tap of Con + or Con − changes contrast by 10%. Pixemon stretches or squeezes every tone away from or towards mid-grey: light areas get lighter and dark areas darker with Con +, and the opposite with Con −.
A small increase makes a hazy or flat photo look clearer. Too much darkens shadows into solid black, brightens highlights into solid white, and makes skin look harsh. Two or three taps are usually enough. If only the shadows or only the highlights need work, use Levels instead.
Levels, for finer control
The Levels tool shows a histogram, a graph of how many pixels sit at each brightness, and three handles underneath:
- Black point: moving it right makes the darkest tones pure black, which deepens shadows.
- Gamma, the middle handle: brightens or darkens the mid-tones without moving black or white, often the best fix for a photo that is slightly dark overall.
- White point: moving it left makes the brightest tones pure white, which brightens a dull photo.
The Blk, Gry and Wht pickers let you click something in the photo that should be black, neutral grey, or white, and Pixemon sets the levels from it. Clicking a neutral grey object with Gry is a quick way to remove a colour cast. The Output levels handles do the opposite of the input handles: they make black lighter or white darker, softening the photo.
Hue, saturation, and brightness sliders
The Hue & saturation controls shift every colour around the colour wheel (hue), make colours stronger or weaker (saturation), and adjust overall brightness. Saturation is the useful one for most photos: a small decrease calms over-vivid phone photos, and a small increase revives dull ones. Large hue shifts are a creative effect rather than a correction. For the formulas behind these sliders, with worked examples, see HSV colour maths explained.
Black and white, and sepia
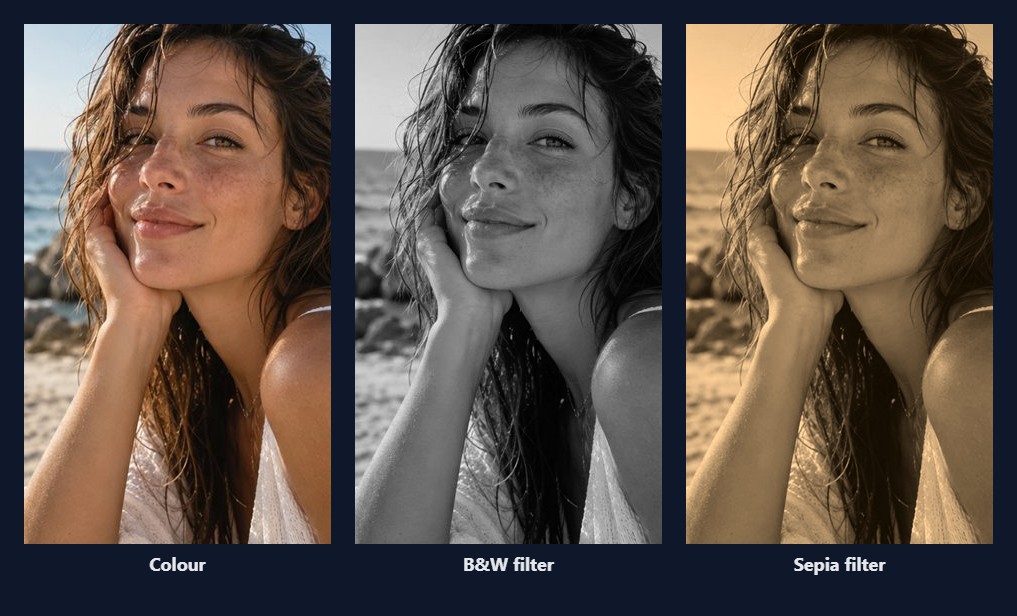
The B&W filter does not simply remove colour: it calculates brightness the way the eye sees it, weighting green most and blue least (0.299 × red + 0.587 × green + 0.114 × blue). A green field therefore looks lighter than a blue sky of similar strength, as it does to the eye. Sepia applies a warm brown tone over the same black-and-white conversion.
Sharpening, blur, and noise
On a computer, the adjustment bar also has Sharpen and Blur. Sharpening increases contrast along edges so details look crisper, but it cannot recover detail the camera never captured, and too much creates bright outlines. A small amount of blur can soften skin or background noise. Denoise, in the print settings, smooths the grainy texture of photos taken in low light; use the lowest setting that removes the grain, because strong noise reduction also smooths real texture.
When to stop
- Skin looks like skin, not orange, grey, or pink.
- Something that should be white or grey looks neutral.
- You can still see detail in the brightest and darkest areas.
- The photo looks natural when you glance away and back again. Long editing sessions make strong colours look normal.
One exception: do not adjust photos for passports, visas, or other official documents. Authorities generally require unaltered photos. See our passport photo guide for official sources.
Try it on your own photo
Open a photo in Pixemon and use the Quick adjustments. Each change is calculated from your original, so you can undo freely.
Open the Pixemon editorRelated guides: print resolution and collage layout ideas.